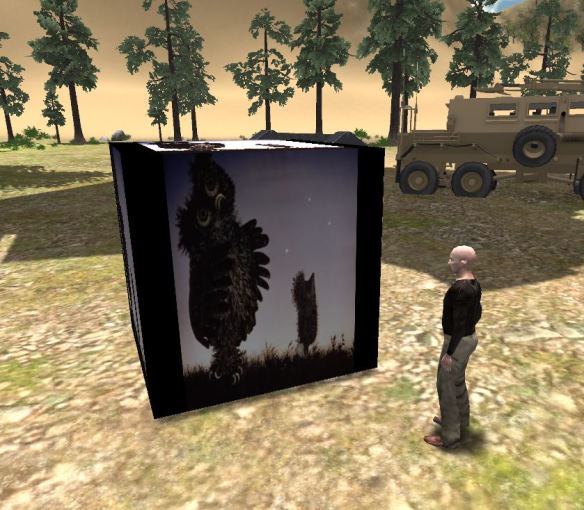
Watching “Hedgehog in the Fog” in my Jibe world.
Note: You’ll need the Unity Pro editor if you want to work with Movie Textures in Unity3d.
Unity3d allows you to embed and play videos on any surface in a 3d environment.
This means you can easily create a web-based Jibe world where avatars explore a multiuser 3d virtual space while watching videos or movies playing on screens/signs/any surface you wish.
The most common way to add video to a Unity3d project is by adding a video file to your project’s Asset Folder, which automatically creates a Movie Texture (details here).
However, adding a video file directly to your project means the size of the video file will be added to the final size of your completed Unity webplayer file. In other words, if your video clip is 50 Megabytes large, then your Unity webplayer file will have an extra 50 Megabytes added on to it.
For folks creating Jibe worlds with Unity3d (or anyone creating Unity webplayer files for streaming on the Web) this is not good. You always want your webplayer file to be as small as possible so your webplayer file will finish downloading and start running as quickly as possible.
Fortunately, there’s a way you can download/stream a movie from the Web so it doesn’t add to the size of your Unity webplayer file. Unity will immediately start playing the movie as soon as it has buffered enough of it, similar to how YouTube works.
Here’s a simple example:
Step 1: Get your video ready as an OGG file on the Web
If you have a video on YouTube that you want to use, you’ll have to download it. I suggest using Flash Video Downloader.
Unity needs videos to be in OGG format (file extension .ogg). If you need to convert an existing video file into OGG format, I suggest using VLC (it’s free and cross platform). Take your OGG video, put it on a webserver somewhere and remember the URL.
Important Note: If you’re managing your own webserver, be sure it has the MIME type for Ogg Vorbis enabled. For Extension use .ogg, and for MIME type use application/ogg.
Here’s a sample 60 Megabyte OGG video I made and uploaded to WordPress. Feel free to use this URL in your own tests. You can also click on it to see how it plays in your browser.
https://becunningandfulloftricks.files.wordpress.com/2013/04/hedgehog_in_the_fog.ogg
Step 2: Create a Cube
In this example, we’re going to make a basic cube and have the video play on its surface. Of course you could flatten the cube so it looks likes a screen and then place it on a model of a TV or something. I’m just being lazy.


Step 3: Create a new Javascript
I like the name of a script to remind me what the script actually does, so I’m going to call this new script ClicktoPlayWebMovie.

Here’s the code. Copy and paste this into your new script and save it.
var url = "https://becunningandfulloftricks.files.wordpress.com/2013/04/hedgehog_in_the_fog.ogg";
function OnMouseDown () {
 // Start download
 var www = new WWW(url);
// Make sure the movie is ready to start before we start playing
 var movieTexture = www.movie;
 while (!movieTexture.isReadyToPlay)
 yield;
// Initialize texture to be 1:1 resolution
 renderer.material.mainTexture = movieTexture;
// Assign clip to audio source
 // Sync playback with audio
 audio.clip = movieTexture.audioClip;
// Play both movie & sound
 movieTexture.Play();
 audio.Play();
}
// Make sure we have audio source
@script RequireComponent (AudioSource)
function Update () {
}
You can see at the top of the script that I’ve included my demo URL as the default movie URL. You can always change it later.
Step 4: Add ClicktoPlayWebMovie script to your cube
Drag the ClicktoPlayWebMovie script from your Project folder onto the Cube in your Scene view. This will add the script to the cube.

Now select your Cube in the Scene view and look at the Inspector settings. You can change the movie URL by simply editing the URL field in the Inspector.
Also notice that there is an Audio Source added to the Cube. This was added automatically when you added the script to the Cube, since the script needs an Audio Source component to work. Don’t delete or modify the Audio Source component. Just leave it be.

Step 5: You’re done. Test it out!
You can run your Jibe world locally in the Unity editor and test it out that way. Walk up to the cube and click on it. The movie will start playing on all surfaces of the cube.

You can also view an online version of this demo in my own Jibe world.
Enjoy!
-John “Pathfinder” Lester
Chief Learning Officer, ReactionGrid Inc.


